How to Request UPI Payments with Google Forms
Cake Studio is a local bakery that accepts orders through Google Forms. When a customer places an order, the customer automatically receives a UPI QR Code to make the payment. This QR Code is generated dynamically based on the order amount and the customer can pay the bill using any UPI app.
In the above screenshot, the customer ordered a Butterscotch Cake through Google Form and they received a customized UPI QR Code that includes the exact bill amount. The amount is calculated automatically based on the selected items in the Google Form.
Google Forms and UPI Payments
This tutorial explains how you can send custom UPI QR Codes to customers automatically whenever they place an order via Google Forms. We will use Google Sheets to calculate the bill amount and generate the QR codes, and Document Studio to send the emails with the QR codes to the customers.
Let’s see how you set up this workflow in a few simple steps.
Prepare Google Form for Orders
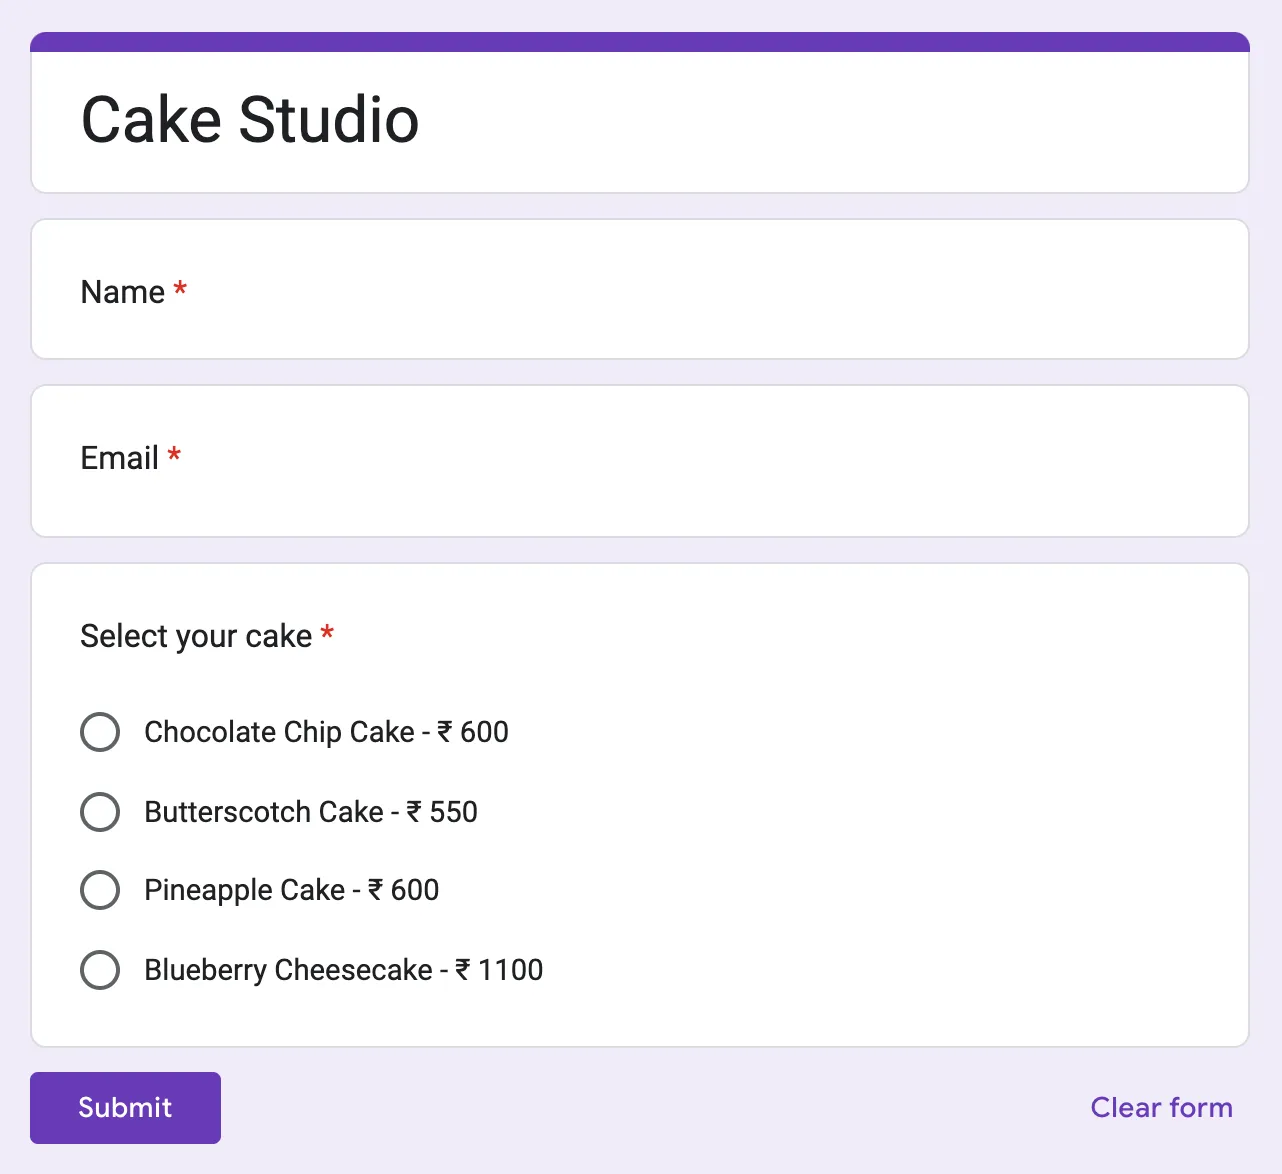
Here is a sample Google Form that we have created for Cake Studio. As you can see, and this is important, we have mentioned the amount of each cake in the options itself.
Prepare Google Sheet
Open the Google Sheet that is linked to the Google Form. The Google Sheet will contain columns for the questions in the Google Form. We’ll now add extract columns that would help us generate the custom UPI QR codes.
You may find the Google Sheet with UPI formulae here
Add Columns to Google Sheet
1. Bill Amount – This column will store the price of the cake that the customer has ordered. We’ll write a formula using the REGEXREPLACE function to extract the price from the selected option.
=ARRAYFORMULA(IF(ROW(D:D)=1,"Bill Amount",
  IF(NOT(ISBLANK(D:D)),REGEXREPLACE(D:D,".+₹ ",""),)))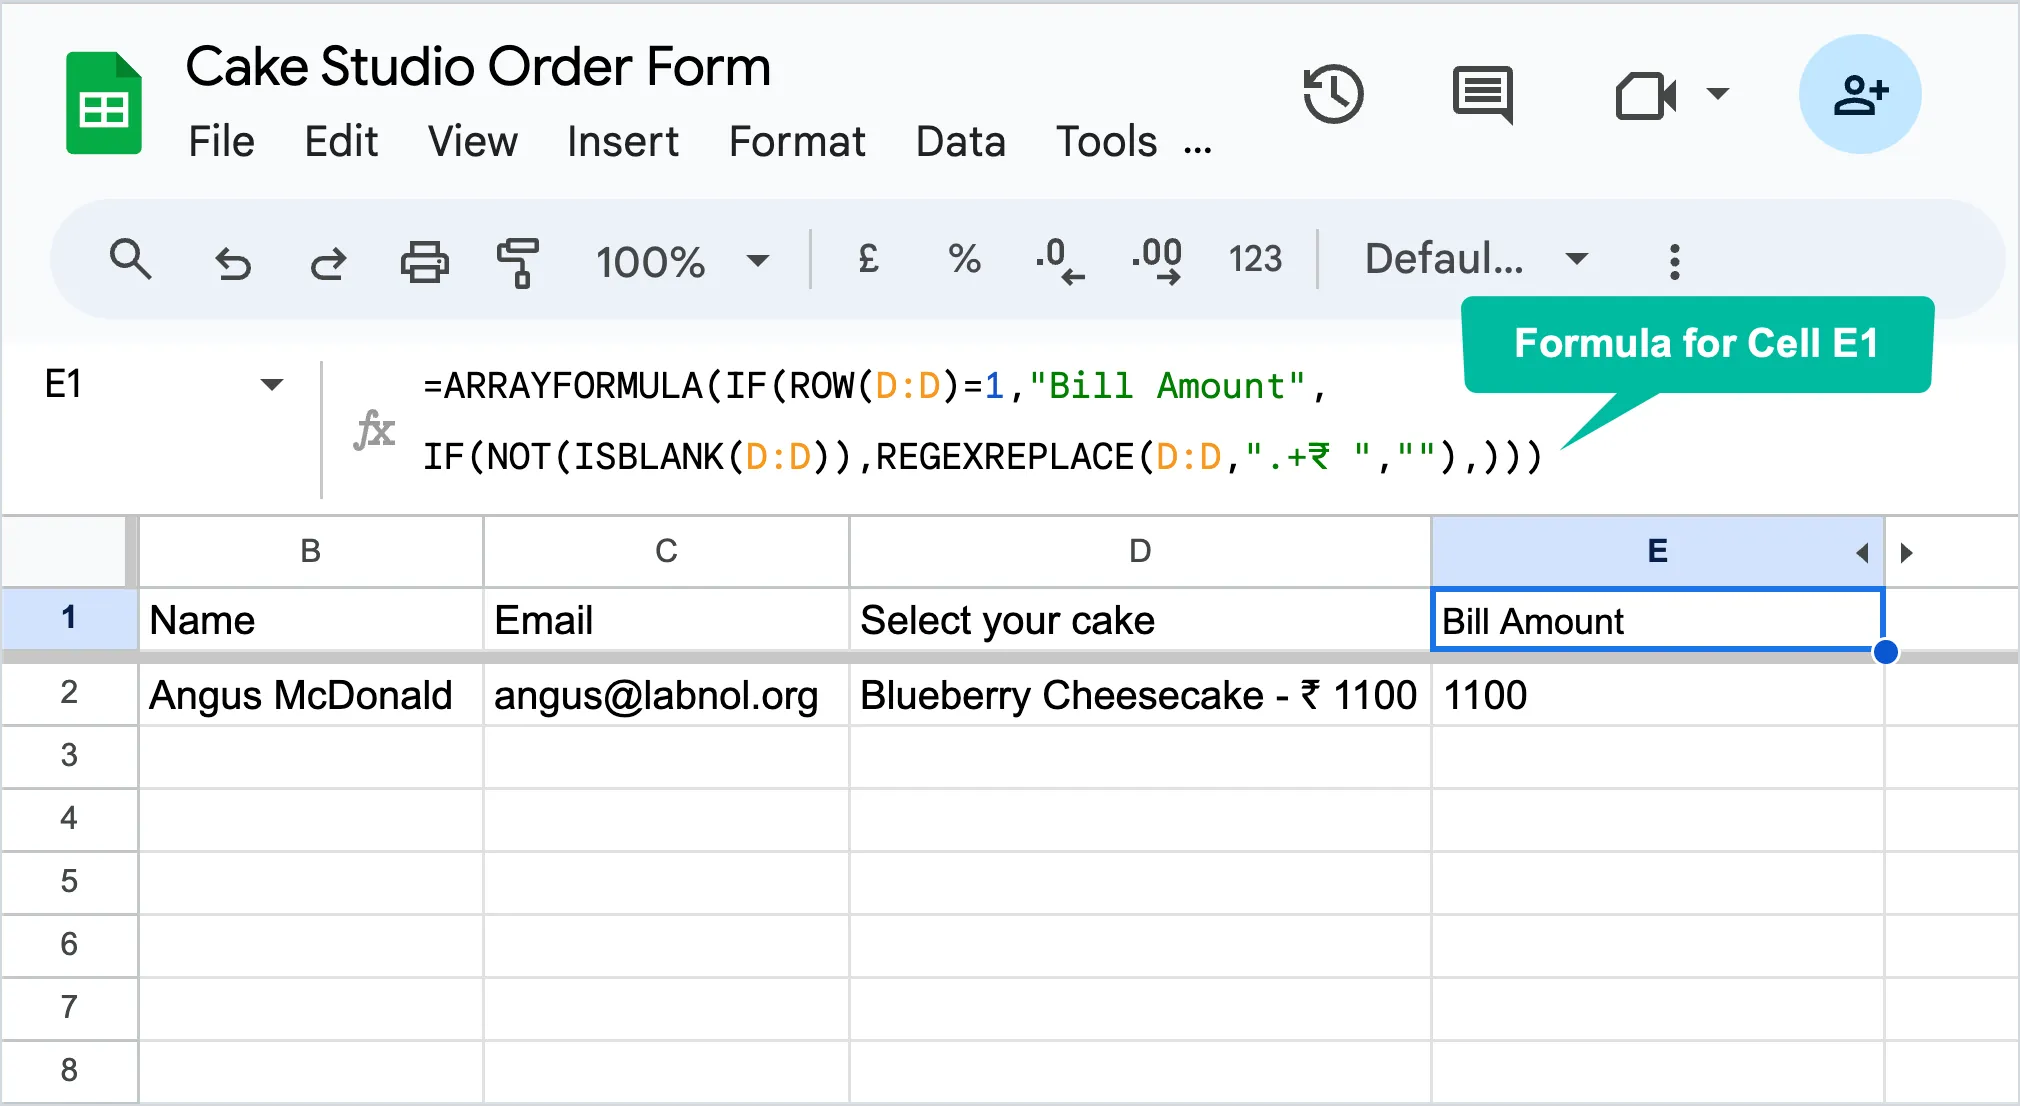
2. Total Amount – Our second column will store the total bill amount which adds GST on the price of the cake. We’ll use Arrayformula to apply the calculation down the entire column.
=ARRAYFORMULA(IF(ROW(E:E)=1,"Total Amount",
  IF(NOT(ISBLANK(E:E)), E:E * 1.18,)))
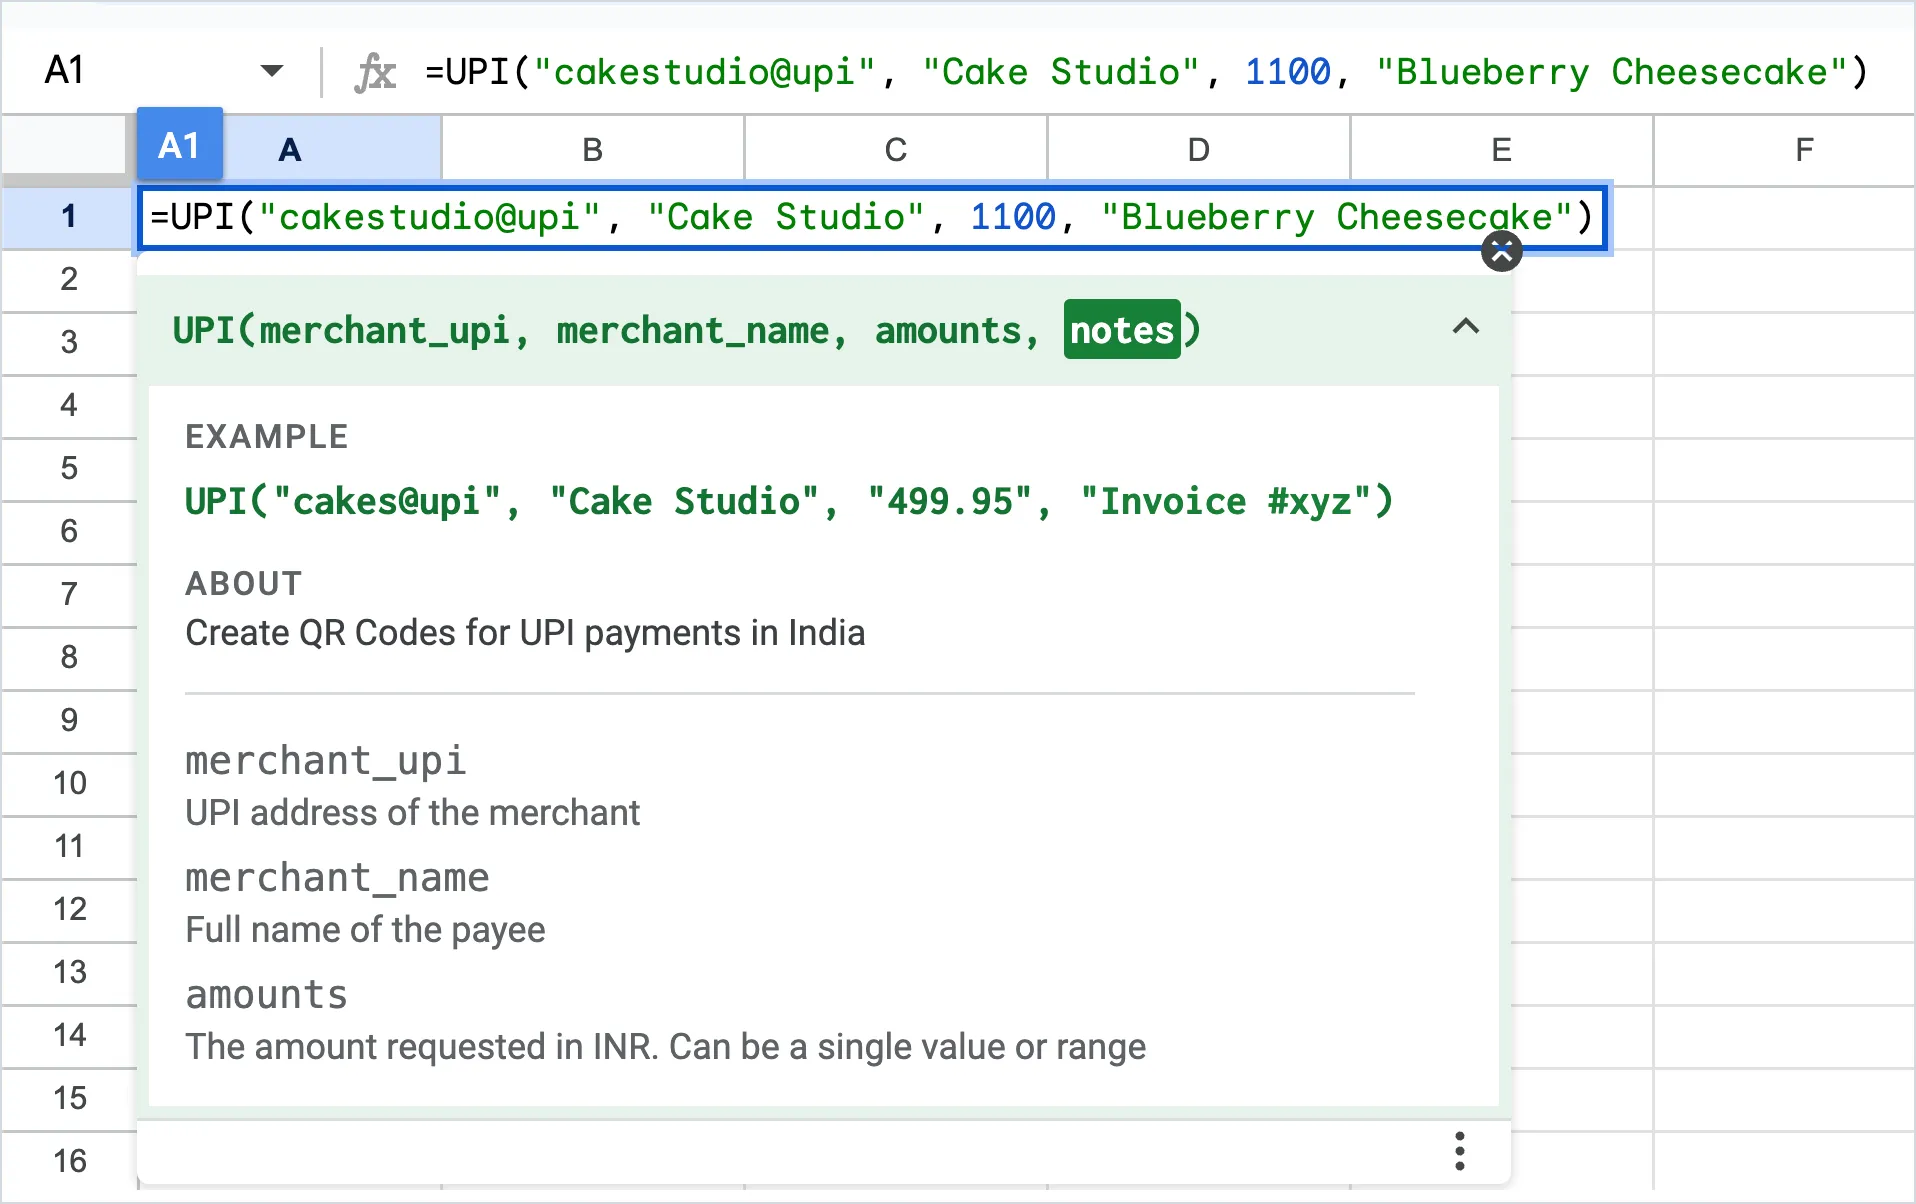
3. UPI QR Code – The final column will store the custom UPI QR code that includes the total bill amount. We will use the built-in UPI function to generate the QR code.
A customized UPI QR Code will be generated for each order. The QR code will include the total bill amount so that the customer can make the payment without having to enter the amount manually.
Embed UPI QR codes in Email
Now that we have the UPI QR codes in the Google Sheet, we will use Document Studio to send emails to customers with the QR codes embedded in the email body.
Launch Document Studio in your Google Sheets and create a new workflow. Add a Send Email task to the workflow. Create a message template that includes the Embed Image marker to embed the UPI QR code in the email.
{{Embed IMAGE, UPI QR Code}}We have mentioned UPI QR Code as the second parameter in the above marker since it is the title of the column that contains the generated QR codes in our Google Sheet.
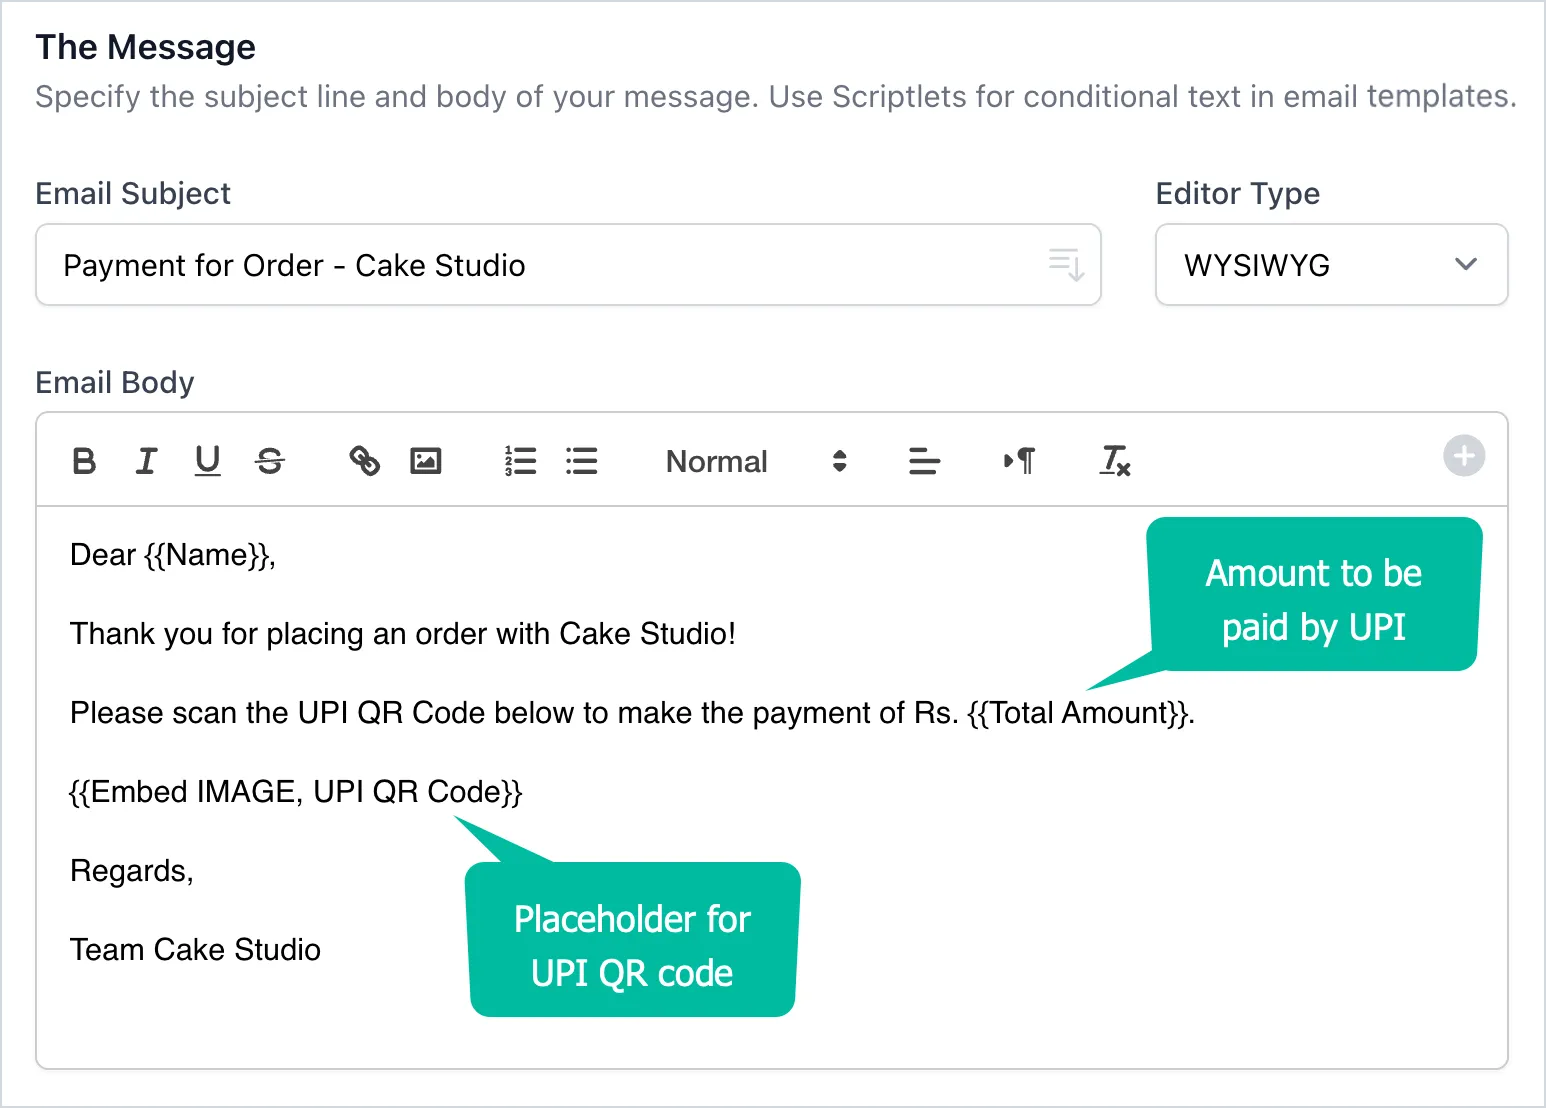
Save the Workflow and make sure to enable the Run on Form Submit option so that the emails are sent automatically whenever a new order is placed through the Google Form.
Test the UPI Payment Workflow
Fill this Google Form and you should see a new row added to this Google Sheet with the bill amount and the UPI QR code. You’ll also receive an email with the UPI QR code embedded in the email body.


